Invite contacts to a portal
Videos: Inviting clients to portal; What your clients see
In order to make a portal active you must first invite someone to use it. When you invite someone via your Contacts module, a new portal is created for that contact. You can have multiple portals, one for each of your contacts. Portals can be activated for all contact types including Clients, Prospects and Suppliers. Think of the portal as a filing cabinet for that entity.
You can invite multiple people to use each of those portals. However, the expected method of use for Client Portal is for you to send an invitation to the email address stored on the Contacts record and then for the person who opens that email and registers with Client Portal to invite other people to the portal.
The invitation you send to a specific email address contains a link to register for the portal. Once the link is clicked, it expires and cannot be used again. However, if the email is forwarded to another person without the link being clicked, that other person can click the link and register for the portal. So, only one person can register via an invitation link because it contains a unique key. Subsequent attempts to register using the same link will not succeed. Therefore, personal invitations need to be sent out to the email addresses of all the people who want to register for the portal.
Portal invitations expire seven days after they have been sent.
When you invite an individual contact to a portal the following actions occur:
- The invitation is sent to that person (subscriber) via email.
- The Client Portal Subscribers panel appears in the contact's Summary tab. The panel displays the subscriber's name and email address, along with the word Pending in red. This word disappears when the subscriber registers to use Client Portal.
- The label on the Invite to Portal button changes to Invite more to portal.
- The contact appears in your Client Portal module, where it can be removed, if required.
Ensure that you have the correct email address stored in your Contacts database before sending an invitation.
- Click Contacts.
- Search for and click on the required contact record to open their Contact Details page.
- Click Invite to Portal.

- The default name and email address (from the Contacts database) appears.
- If no email address appears by default, it means no email address was recorded in the contact's record, so you must type one in.
- You can edit the default name and email address to invite someone else to that contact's portal.
- Edit the default permissions, if required: you can clear the check boxes to prevent the person from inviting other people to the portal or viewing the My Details and/or My Documents section of the portal.

The Invite other people to the portal option on the above dialog box will be unavailable unless the Clients can invite others to portal option is selected in the Portal Settings.
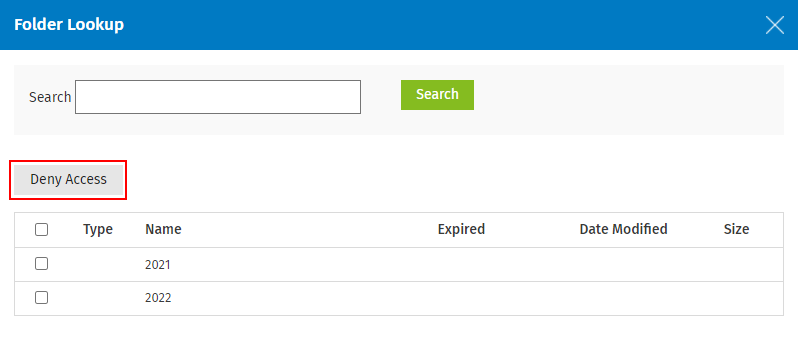
- Restrict access to certain folders or documents within the portal, if required:
- Click Set Folder Permissions.
- Select the check box of the folder or document that you want to prevent the person from accessing.
- Click Deny Access.

- Click Contacts.
- Search for and click on the required contact record to open their Contact Details page.
- Click Invite more to portal.
- Type the name and email address of the person you want to invite.
- Edit the default permissions, if required (see step 5 above for details).
- Restrict access to certain folders or documents within the portal, if required (see step 6 above for details).
- Click Invite.
